Hosting Your First Make & Take Class: In-Person and Online Success
Oh, my beautiful Esseniq people! How many of us have dreamed of gathering our friends, those soul sisters who get us with just a glance, to share an afternoon of laughter, delicious aromas, and learning? How many times have we imagined turning that chat into something more, into the spark that ignites a new path to wellness for them and a beautiful boost for our own journey? Well today, my dear, we're going to turn that vision into a tangible reality. This isn't just any class; it's an experience, a breath of fresh air in the daily routine, a space designed with love so that every guest feels special and discovers the empowering world of essential oils. Get ready to be the perfect hostess with this ultimate guide, where you'll learn to organize a "Make & Take" class that isn't just an event—it's a celebration of life and wellness!
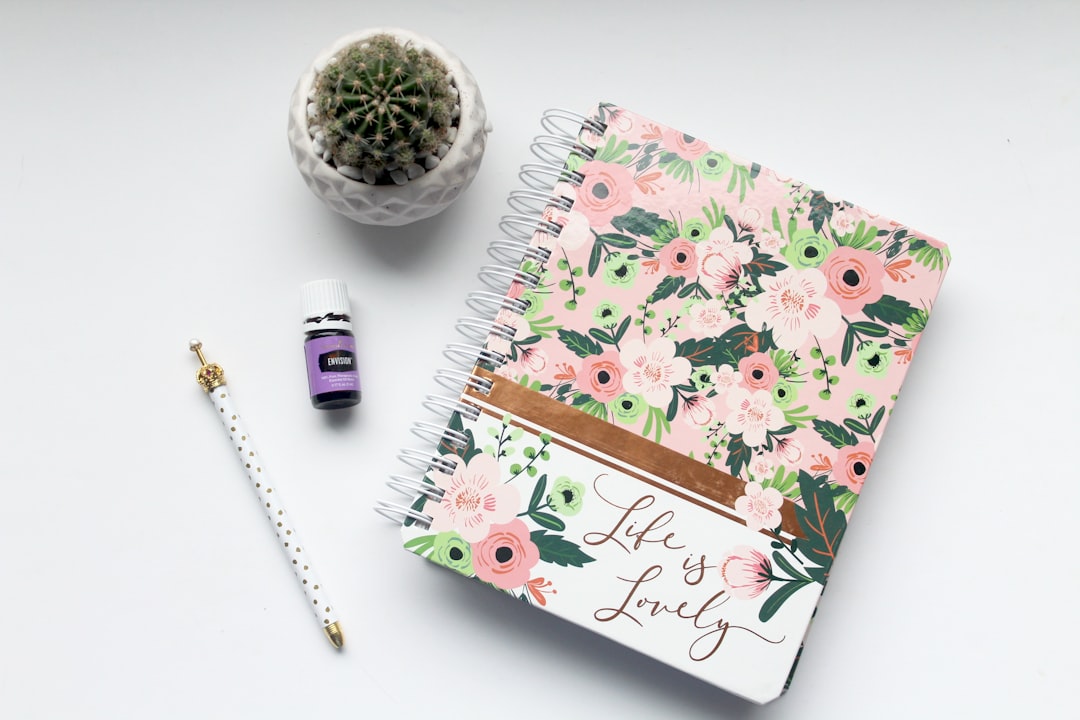
[IMAGE: A wide shot of a very bright living room with large windows, where natural light floods the space. In the center, a minimalist light wood table is elegantly set with fresh flowers in a glass vase, unlit beeswax candles, white and wood Young Living diffusers, and stemmed crystal glasses with a NingXia Red mocktail (deep burgundy color). "Clean Girl" and very cozy atmosphere.]
What exactly is a "Make & Take" and why does it work?
Imagine this: a gathering where you don't just talk about wellness, you create it with your own hands. That, my friends, is a "Make & Take" in its purest essence. It's a hands-on, interactive, and deliciously immersive workshop where the magic of essential oils comes to life. The main idea is for each guest to learn the essential basics—what they are, how to use them, why Young Living is different—and then, the most exciting part, they prepare their own essential oil creation to take home.
And why does it work so wonderfully well? The answer lies in the deepest human psychology, that of experiential learning and the inherent value of what we create ourselves. When your guests mix, smell, and craft a Lavender (Lavandula angustifolia) roll-on with their own hands, the information is not only better retained, but it becomes emotionally ingrained. It's not a simple sample; it's their creation, a physical testament to what they've learned. It eliminates the initial perception of "I'm going to a meeting where they'll try to sell me something" and transforms it into "I'm going to a creative workshop where I'll learn and take something useful home." The investment for you as a hostess is minimal, but the perceived value for the guest is immense. It's the perfect bridge between education and experience, opening doors in a gentle, authentic, and utterly irresistible way.
[IMAGE: A close-up shot of female hands (neutral, delicate manicure) mixing essential oils in a small glass roll-on bottle. In the blurry background, you can see Young Living essential oil bottles, a small dish with dried lavender flowers, and a light wood background. Bright, natural lighting.]
In-Person vs. Online: How to Adapt the Magic
In this beautiful, connected era, we have the blessing of being able to share wellness in two magical ways. Whether you prefer the warm embrace of an in-person gathering or the global reach of an online connection, the essence of the Make & Take remains. Here's how to adapt your magic to each format:
| Feature | In-Person Experience at Home | Online Experience (Zoom/Video Call) |
| :------------------------ | :----------------------------------------------------------------------------------------------------------------------------------------------------------------------------------------------------------------------------------------------------------------- | :----------------------------------------------------------------------------------------------------------------------------------------------------------------------------------------------------------------------------------- |
| Sensory Interaction | Direct and Immediate: Your guests smell the purity of Young Living's Seed to Seal line, taste the delicious NingXia Red in crystal glasses, and feel the silky texture of the V-6 vegetable oil complex (fractionated coconut, sesame, grapeseed, sweet almond, wheat germ, sunflower, and olive oils) on their skin. It's a feast for the senses. | Prepared and Anticipated: You send a "Mini Sample Kit" in advance (small 1/4 or 5/8 dram vials of the key oils they'll use in the recipe, a scent strip, maybe a bag of herbal tea). They experience the aromas from the comfort of their own home. |
| DIY Materials | Provided by you: You prepare all the ingredients and containers (roll-on bottles, sprayers, salts) on the table. A beautiful and organized setup that invites creativity. | Sent or Purchased by them: You can send a very simple "DIY kit" (roll-on bottle, carrier oil base like V-6, and the main essential oil) or provide a list of basic materials for them to acquire before the class. |
| Personal Connection | Intimate and Close: Direct eye contact, shared laughter, little whispers as they mix. The group's energy is palpable, and friendships are strengthened. | Visual and Auditory: Although without physical contact, the connection is built through the camera, chats, and live interactions. Encouraging active participation with questions and comments is key. |
| Event Logistics | Setup and Teardown: Requires preparing your space, the table, and the decor. Afterward, you need to clean up. Offering an impeccable environment is part of the experience. | Shipping Logistics: Preparing and sending the "Mini Kits" on time is crucial. You need to make sure everyone receives them well before the event date. |
| Reach | Geographically Limited: Ideal for your local community, friends, and nearby family. It fosters local networking. | No Geographic Limits: You can reach people in other cities or countries, expanding your network exponentially. The global Young Living community is your canvas. |
| Associated Costs | Low Initial Investment: Essential oils you already have, inexpensive containers, carrier oil, NingXia Red for tasting. | Shipping Costs: Mainly the cost of sending the "Mini Kits" or DIY materials. One strategy is to have guests contribute a small fee to cover these expenses. |
Regardless of the format, the crucial thing is to convey that vibrant, authentic energy that makes Young Living so special. The key is the preparation and the love you pour into every detail.
The Event's Aesthetic: Secrets of a 'Clean Girl' Hostess
My love, for your Make & Take class to be unforgettable and feel like an accessible luxury experience, the ambiance is just as important as the content. We want your guests to lose track of time and immerse themselves in a wellness oasis. Here are the secrets to achieving that 'Clean Girl' aesthetic that radiates good taste and hospitality:
1. Sound Harmony: Forget background noise or the TV. Opt for a carefully selected playlist: soft jazz, relaxing lo-fi instrumental music, or chillout melodies. The volume should be very subtle, like a lullaby accompanying the conversation.
2. The Magic of Natural Light: If you can, schedule your event during daylight hours. Open curtains, blinds, or sheers. Natural light instantly creates a fresh, serene, and photogenic atmosphere (perfect for Instagram stories!). If it's at night, use lamps with warm, dim light, avoiding fluorescent lights.
3. The Soul of the Scent (The Diffuser is Your Best Friend): Before your guests arrive, turn on your Young Living diffuser. Choose soft, inviting blends that encourage relaxation and connection. Some divine suggestions:
- Cozy: Orange (Citrus sinensis), Frankincense (Boswellia carterii), and Vanilla (Vanilla planifolia).
- Gentle & Revitalizing: Citrus Fresh and Peppermint (Mentha piperita).
- Calming: Lavender (Lavandula angustifolia) and Copaiba (Copaifera officinalis).
4. **The Table, Your Creative Canvas:**
- Uncluttered and Clear: A large, spacious wood or glass table is ideal. Make sure it's impeccable. Avoid clutter.
- A Natural Touch: A small bouquet of fresh flowers (white roses, eucalyptus, lavender) in a simple glass vase, or a few eucalyptus sprigs on the table, bring freshness and life.
- Key Props: Have your Young Living essential oil bottles with their original labels handy, small bowls with dried flowers (like lavender or calendula) if the recipe allows, paper towels for cleaning up potential spills, and of course, the empty bottles, roll-ons, or sprayers for the DIY.
5. Welcome Elixir: NingXia Red Mocktails: Prepare a delicious mocktail with Ningxia Red in advance. Serve it in pretty crystal glasses (like wine or cocktail glasses) with ice, orange slices, or even a sprig of mint or rosemary. Not only is it a visual and tasteful delight, but it's a subtle way to introduce the incredible benefits of this Young Living superfood.
[IMAGE: A platter of NingXia Red mocktails in stemmed crystal glasses, decorated with orange slices and mint leaves. The colors are vibrant (burgundy red). Natural lighting, with a slightly out-of-focus background of a bowl of Goji berries. 'Clean Girl' and appetizing aesthetic.]
Your First Class Step-by-Step: The Script for Success
Organizing a Make & Take class is like conducting an orchestra, my dear. Each step has its own timing and melody. Here is a detailed guide for your event to flow with grace and purpose:
Step 1: Welcome & Tasting (Breaking the ice, about 10-15 minutes)
The first impression is everything! Greet each guest with a genuine smile and a warm hug. Guide them to the beautifully set table.
- The Welcome Mocktail: Immediately offer them a refreshing NingXia Red mocktail. As they enjoy it, you can chat casually, ask how they are, if they have ever used essential oils, or what they're curious about. This helps relax the atmosphere and make them feel comfortable.
- Short Introduction: Briefly introduce yourself and, if you have a co-host, introduce them as well. Thank everyone for coming.
- The Icebreaker Question: A good strategy is to ask, "What is one word or feeling you'd like to take away from this workshop today?" This gets them involved from the start and gives you clues about their needs.
Step 2: Basic Education (Knowledge is power, about 20-30 minutes)
This is the educational heart of your workshop. Keep the information clear, concise, and easy to digest. Avoid "paralysis by analysis."
- What Are Essential Oils? Explain simply that they are pure, potent extracts from plants—the concentrated essence of nature. You can show a plant (if you have one of the ones you'll be using, like a sprig of lavender) and then the essential oil bottle to illustrate.
- The Young Living "Seed to Seal" Promise: This is your moment to shine. Explain why Young Living is different. It's not just a process; it's a promise of unparalleled quality and purity, from planting the seed to sealing the bottle. Talk about their own farms, pesticide-free cultivation, careful distillation, and rigorous testing. People look for trust and authenticity; Seed to Seal is the proof.
- The 3 Sacred Methods of Use:
1. Aromatic: Diffusion (show your diffuser), direct inhalation from the bottle, or a drop in the palms of your hands to inhale. Explain how this affects the limbic system (emotions, memory).
2. Topical: Application to the skin. Explain the importance of diluting with a carrier oil like V-6 to prevent sensitivity and enhance absorption. Show the V-6 base. You can offer a small sample for them to test the texture on their hands. "Remember, as a general rule, for sensitive skin or children, use 0.5-1% dilutions. For adults, 2-3% is a good starting point."
3. Internal (Flavoring): Emphasize that ONLY oils labeled as "Vitality" (in the US) or with a "Food Supplement" label (in Europe) are approved for internal consumption. Highlight the importance of Young Living's quality for this use. You can mention how they can be added to drinks or recipes.
[IMAGE: A young woman with medium brown hair, wearing a cream-colored linen blouse, kindly gesturing and explaining something about a a white and wood Young Living diffuser. Around her, two friends listen attentively with interested expressions. On the table, there are Young Living oil bottles and an open notebook. Natural light, warm, and educational atmosphere.]
Step 3: Let's Get Hands-On! (The magical creation, about 25-35 minutes)
This is the most anticipated and fun moment! The atmosphere should be one of joyful experimentation.
- Introduce the Chosen Recipe: Briefly explain the name of the product they will create (e.g., "Our 'Sweet Dreams' roll-on for restful nights") and the benefits of the oils they will use.
- Clear, Step-by-Step Instructions: Have the instructions printed (or even written on a nice chalkboard) and guide them verbally through each step.
- "First, let's take our 10 ml roll-on bottle."
- "Now, we're going to add X drops of Lavender (Lavandula angustifolia). This is our star oil for relaxation." (As you say it, they do it).
- "Next, Y drops of Copaiba (Copaifera officinalis), which enhances the effects of Lavender."
- "Finally, we fill the rest of the bottle with our V-6 Vegetable Oil Complex up to the neck of the bottle."
- "We place the roller ball and the cap on, and shake gently."
- Personalized Labeling: Offer pretty pre-printed labels or even permanent markers for them to personalize their creations. This will make them feel even more ownership of the product.
- Usage Tips: Once everyone has finished, review how and when they will use their creation at home.
3 Easy and Affordable Recipes for Your Workshop
These recipes are perfect because they use common oils from the Premium Starter Kit, are easy to make, have inexpensive materials, and offer tangible benefits that your guests will immediately appreciate.
1. "Sweet Dreams" Roll-On (For a restful night)
- Objective: To promote deep relaxation and restful sleep.
- Ingredients:
- 10 drops of Lavender (Lavandula angustifolia) Essential Oil
- 5 drops of Copaiba (Copaifera officinalis) Essential Oil
- 10 ml of V-6 Vegetable Oil Complex (Young Living carrier oil)
- 1 10 ml dark glass roll-on bottle
- Application Instructions: Before bed, apply generously to temples, the back of the neck, wrists, and the bottoms of the feet. Massage gently. Use every night as part of your pre-sleep routine. The dilution is approximately 7.5%, perfect for frequent topical use in adults.
2. "Fresh Air" Spray (To purify the atmosphere)
- Objective: To neutralize odors and naturally freshen any space.
- Ingredients:
- 15 drops of Purification® Essential Oil (proprietary blend of Citronella (Cymbopogon nardus), Lemongrass (Cymbopogon flexuosus), Myrtle (Myrtus communis), Rosemary (Rosmarinus officinalis ct. cineole), and Tea Tree (Melaleuca alternifolia))
- 5 drops of Lemon (Citrus limon) Essential Oil
- 30 ml of alcohol-free Witch Hazel (Hamamelis virginiana) or grain Vodka (as an emulsifier)
- 10 ml of distilled water
- 1 50 ml amber glass spray bottle
- Application Instructions: Mix the essential oils with the witch hazel or vodka in the spray bottle. Shake well. Then, add the distilled water and shake again. Spray generously into the air, over fabrics (sofas, curtains), or in any area that needs a touch of freshness. Avoid spraying directly on the skin. Shake before each use. The dilution is approximately 3% in the aqueous phase.
3. "Muscle Relief" Bath Salts (For after a busy day)
- Objective: To relieve muscle tension and promote relaxation.
- Ingredients:
- 8 drops of PanAway® Essential Oil (proprietary blend of Wintergreen (Gaultheria procumbens, active component: methyl salicylate), Helichrysum (Helichrysum italicum), Clove (Syzygium aromaticum, active component: eugenol), and Peppermint (Mentha piperita, active component: menthol))
- 5 drops of Copaiba (Copaifera officinalis, active component: β-caryophyllene) Essential Oil
- 1 cup of Epsom Salts (magnesium sulfate)
- 1/4 cup of Baking Soda (optional, to soften water and deodorize)
- 1 tablespoon of Jojoba Oil (Simmondsia chinensis) or V-6
- 1 airtight glass jar for storage (approx. 250 ml capacity)
- Application Instructions: In a glass bowl, mix the Epsom salts and baking soda. In a small container, combine PanAway and Copaiba with the Jojoba/V-6 oil. Pour the oil mixture over the salts and stir very well with a spoon until the oils are evenly distributed and the salts have a delicious aroma. Transfer to your airtight jar. To use, add 1/2 cup of the mixture to the bathtub under running hot water and soak for 20-30 minutes for deep relief.
The Elegant Close: How to Introduce the Starter Kit Without Sounding Salesy
My love, the close of your Make & Take class is a delicate dance between continuing education and a genuine invitation. This is where we transform that beautiful experience into an opportunity for your guests to decide to take wellness to the next level in their own homes. Remember, it's not a sales pitch, it's a value proposition!
- The Natural Bridge: Once the DIY activity is finished and your guests are happy with their creations, pause and say with a smile: "My loves, isn't it a delight to see everything we created today with just a few drops of botanical magic? I know your minds are probably racing with all the wonderful things you could do at home if you had these oils on hand, right?" (Wait for nods).
- The Smartest Solution: "If you loved what we did today, and you want to replicate these and many other recipes to transform your home, your wellness, and that of your family, the smartest, most economical, and empowering way to do it is with the Young Living Premium Starter Kit."
- Highlight the Kit's Benefits (NOT just the price):
- "This kit is like your personal natural medicine cabinet, with the 12 most versatile essential oils for every area of your life: from emotional wellness to digestive support, and even skin care." (Show the kit, open it, or ideally, have one on display if you're in person).
- "It comes with a gorgeous designer diffuser so you can purify your air and harmonize your space from day one."
- "And best of all, when you get it, you're not just buying oils, you're joining our Esseniq community, where you'll have constant support, personalized training, and access to all our recipes and protocols."
- "Consider this: if you were to buy each of these oils separately, the investment would be so much higher! The Starter Kit is the most cost-effective gateway to a different lifestyle."
- Present the Enrollment Options:
- "There are two wonderful paths: you can get it as a 'Preferred Customer' just for your personal use and enjoy wholesale prices, or as a 'Distributor,' if what we shared today resonated with you and you feel the passion to share wellness with others, just like I do. Both options are divine!"
- The Gentle CTA: "For those who feel that now is the time to invite this magic into your lives, I have a direct link here (or a physical form) so you can choose your Premium Starter Kit and begin your journey. I'm here to answer any questions and guide you every step of the way."
- Offer Incentives (optional): If your personal strategy allows, you can offer a small incentive for signing up on the spot (e.g., an extra roll-on you made, a recipe book, a kit of mini bottles).
- Never pressure: Make it clear that the decision is completely theirs. "Take your time, feel the energy, and if you have any questions, I'm always here for you!"
[IMAGE: An open Young Living Premium Starter Kit on a light wood table, surrounded by individual essential oil bottles and the Dewdrop diffuser. The bottles are gleaming under natural light. An aesthetic of luxury and empowerment, with an Esseniq.es business card subtly visible.]
Frequently Asked Questions (FAQ)
Should I charge an entry fee for my Make & Take class?
It depends on your comfort level and the investment you're making. If you are sending kits by mail or preparing costly materials for the DIY, you can set a small cost-recovery fee. However, many hostesses prefer to offer it for free to attract more people and focus the value on education and experience, knowing that the opportunity to present the Starter Kit is the main goal. If you do charge, make sure the fee justifies the value you're offering.
How many guests is the ideal number for a Make & Take class?
For an intimate and manageable in-person experience, a group of 4 to 8 people is perfect. It allows for personal interaction and lets you address all questions. For an online event, you can handle slightly larger groups (up to 15-20), as long as you have a way to interact with everyone (chat, open questions). Less is more when it comes to building relationships.
What do I do if someone says they'll think about it?
My love, that's completely normal and okay! Respond with empathy and understanding: "Of course! Take your time. I know it's a lot of new information, and we want you to make the best decision for you. If any questions come up, don't hesitate to message me. Here's my number, and you can also find me at Esseniq.es. I'm here for you whenever you need!" The important thing is not to pressure, but to keep the door open for a future conversation. Follow-up is key, without being pushy.
When is the best time to host a Make & Take class?
Weekend mornings (Saturday or Sunday) or weekday evenings (Tuesday or Thursday after work hours) tend to be the most popular. Observe your target audience's schedules and survey your friends to see what day and time works best for them. The ideal duration is 1.5 to 2 hours, not including the initial welcome.
Do I need to be an expert on essential oils to teach a Make & Take class?
Not at all! Your authenticity and passion are your best tools. The beauty of these classes is that they are designed to teach the fundamentals. Know the oils in the Starter Kit, the Seed to Seal process, and the three methods of use well. For the rest, you can rely on materials from Young Living or your "upline." The important thing is to share from your own experience and enthusiasm. People connect with people, not with walking encyclopedias.
[IMAGE: Final scene of a group of 3-4 young women (Latina ethnicity, medium brown hair, neutral, 'Clean Girl' looks) laughing and sharing at the table. Each holds her newly made roll-on bottle. There are glasses of NingXia Red and fresh flowers. Sunlight streams through the window, and a Young Living diffuser sits peacefully on the table. An atmosphere of friendship and accomplishment.]
Conclusion: Your Hostess Journey Begins Now!
Oh, my beautiful Esseniq people! You've reached the end of this guide, and I hope that every word, every piece of advice, has ignited a spark in your hearts. You now have all the tools, all the knowledge, and the inspiration to go out and host your first Make & Take class. Remember, this isn't just an event; it's an opportunity to build networks, to empower other women, to share the magic of nature, and yes, to see your own business blossom in an authentic and joyful way.
Don't let fear or perfectionism rob you of the chance to create something beautiful. Start by inviting those 3 or 4 friends you know will love this experience. Prepare that delicious NingXia Red mocktail, turn on your diffuser, put on that soft music, and let the magic happen. Imagine the laughter, the "ahhs!" of surprise when smelling an oil for the first time, the satisfaction of creating with their own hands.
So, my dear, what are you waiting for? The Esseniq universe is urging you to take that first step! Schedule your first class this very week. Enjoy the process of being a hostess, of educating with love, and of celebrating the wonderful gift of sharing wellness. To victory! And don't forget you can always download our presentation guides and join our community to continue growing together at Esseniq.es. We are waiting for you!
---